Initialize the wayfinding app
This guide is the second part of a five-part series on creating a wayfinding experience to help a user understand where they are, choose a destination, localize to that location, and follow AR guidance in the space. The first section to set up the project shows how to configure an existing project to add and embed the Niantic Software Development Kit (NSDK).
This section shows you how to initialize a wayfinding app's entry flow. Specifically, this part of the guide shows you how to:
- Create the app entry point - set the wayfinding app as the root UI, create a listener to deliver frames to the NSDK, and create long-lived session managers and objects.
- Present authorization - add sign-in state and display authorization UI when needed.
- Request permissions - check and request required camera and location permissions.
- Route to Sites flow - define navigation that moves the user from the entry screen into the Sites screen.
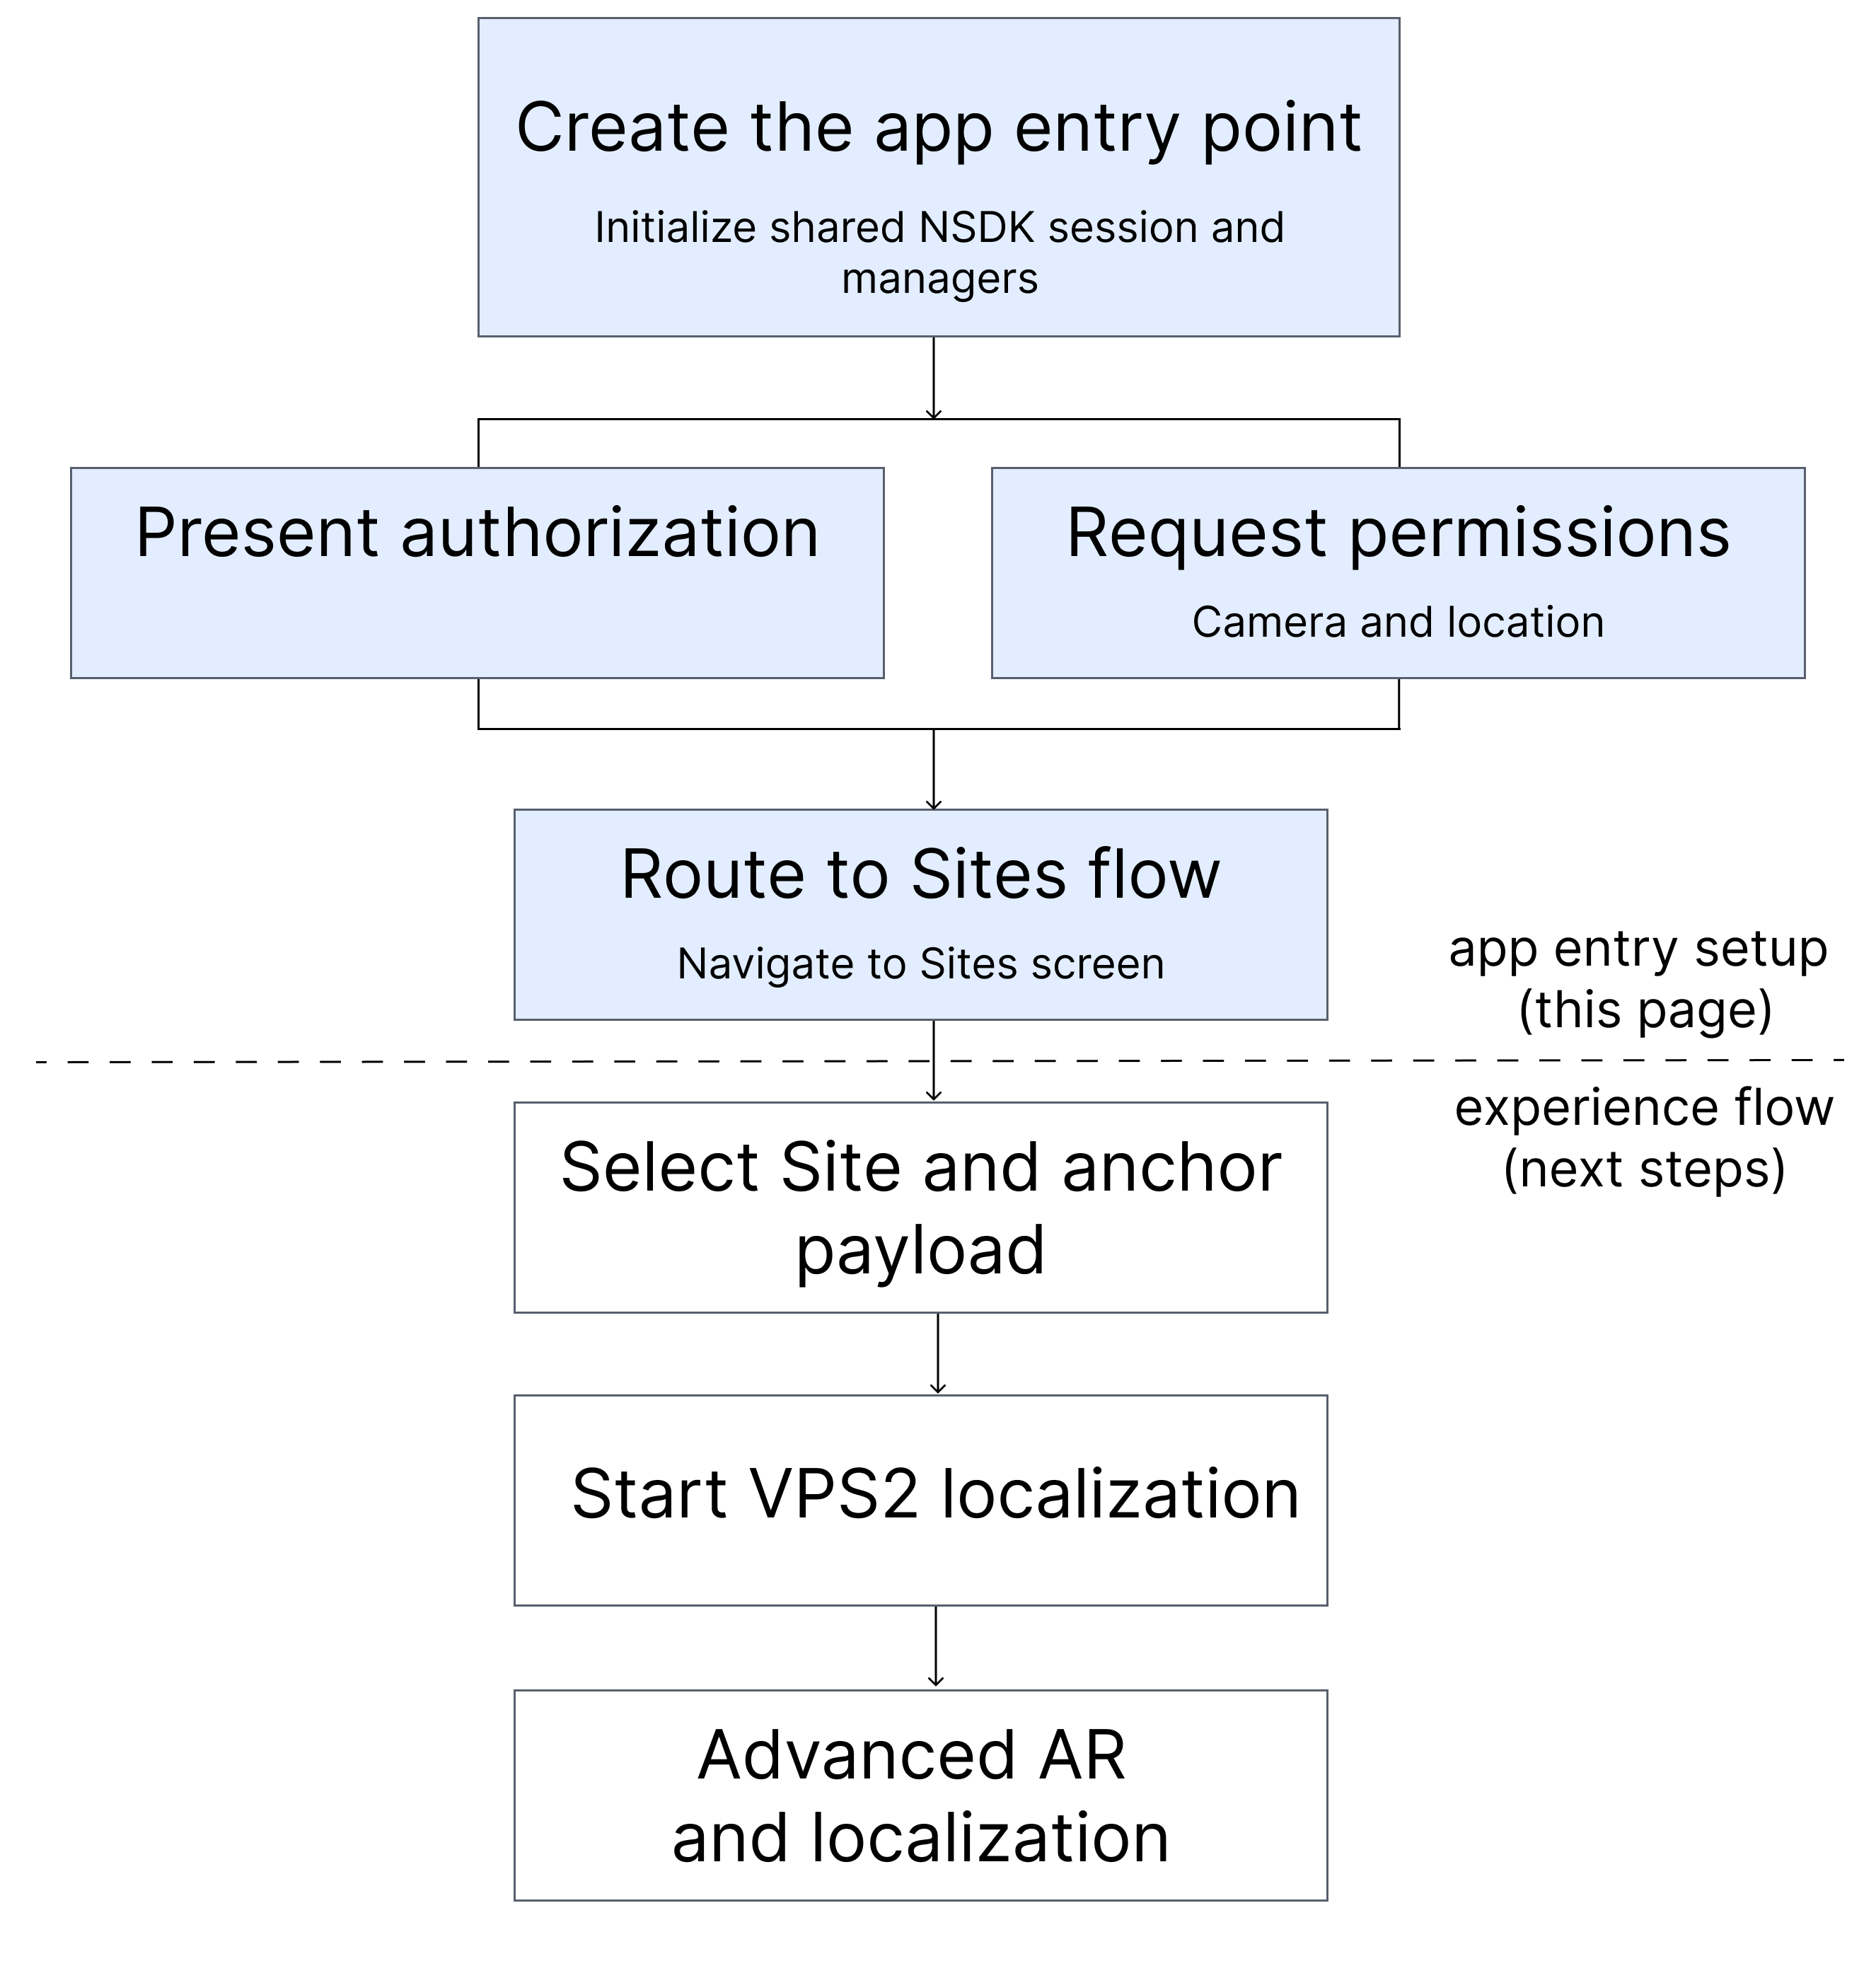
Figure: This part of the tutorial shows how to initialize the app and route the user into the Sites flow. The steps in the next pages implement Site selection, VPS2 localization, and AR wayfinding.